
A 250 sq. ft. darkroom offers ample space for photographers and film enthusiasts to develop their work in an efficient and organized environment. Whether you’re a hobbyist or a professional, designing a darkroom that balances functionality and creativity requires thoughtful planning. This guide explores the essential elements, layout, and tips for creating a practical darkroom in this compact space.
Optimal Layout for Efficiency
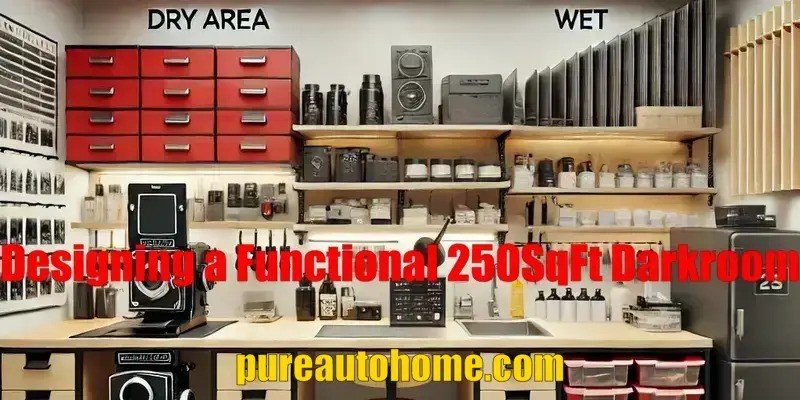
To make the most of your 250 sq. ft., divide the space into three functional zones:
- Dry Area
- This section is for tasks that don’t require water, such as organizing negatives, cutting prints, and working with the enlarger.
- Equip the dry area with a sturdy workbench, storage cabinets for light-sensitive materials, and a comfortable chair.
- Ensure that the workbench is ergonomically designed for prolonged use.
- Wet Area
- The wet area is where the actual film and print development takes place. Include a sink, chemical trays, and drying racks.
- Use waterproof materials for counters and install splash-proof wall panels to protect against chemical spills.
- Adequate drainage and easy-to-clean flooring, such as vinyl or epoxy, are essential.
- Storage and Utility Area
- Proper storage is crucial for maintaining an organized and safe workspace. Use wall-mounted shelves and closed cabinets to store chemicals, paper, and tools.
- Label containers to avoid confusion and ensure that all hazardous materials are kept in a well-ventilated, secure location.
Lighting Considerations
Lighting plays a pivotal role in a darkroom.
- Safe Lighting: Install red or amber safelights to protect light-sensitive materials during the developing process. Position these lights strategically to provide visibility without compromising the safety of your prints.
- Task Lighting: Use dimmable, shielded lights for general tasks that don’t involve film or paper exposure.
- Ensure that all windows and doors are completely lightproof to avoid accidental exposure.
Ventilation is Key
Chemical fumes can build up in a small space, making proper ventilation a necessity. Install an exhaust fan to circulate air and reduce odor. If possible, include an air purifier to maintain a safe and comfortable working environment.
Choosing the Right Equipment
A compact darkroom should focus on efficient equipment placement. Essential tools include:
- An enlarger for creating prints from negatives.
- Chemical trays for developer, stop bath, and fixer solutions.
- A reliable timer to ensure precise processing times.
- Compact drying racks to save space while ensuring prints dry evenly.
Design Tips for Small Spaces
- Vertical Storage: Optimize wall space using shelves and hooks.
- Multipurpose Furniture: Use foldable tables or movable counters to increase flexibility.
- Modern Aesthetics: Opt for sleek, minimalist designs with matte black or neutral tones for a clean look.
Conclusion
A 250 sq. ft. darkroom can be both functional and inspiring with the right design. By focusing on efficient zoning, proper lighting, and well-organized storage, you can create a space that supports your creative pursuits. With a little planning and attention to detail, your darkroom will become a haven for developing stunning photography projects.